How to Embed video into your Mailjet email campaigns
Playable is fully integrated with Mailjet, making it quick and easy to add videos to your emails
Engage your audience, increase post-click activity, and sell more products with Mailjet video email
Video ❤️ Email
Easily add video to your email marketing campaigns.
High quality video that plays automatically on 99% of inboxes.
Patented Video Email technology works with any email platform.
Increase Video Views
Video is the most engaging content. Email is the most trusted channel.
Start sending your best content to your best audience.
Maximize the reach and ROI of your video marketing.
Optimize Engagement
Video stimulates interest and desire more than any other content type.
Video email viewers are better qualified to drive post-click activity.
Get more clicks. Sell more stuff.
Step-by-step Tutorial: How to embed video into Mailjet emails using Playable
In this tutorial, you will learn how to create, embed, and send a Video Email using Mailjet and Playable, which plays automatically at the moment of opening the email – like these examples.
If you want to use an MP4 video specifically, or videos from YouTube, Vimeo, TikTok, Facebook, Instagram, or other channels, you may prefer our other tutorials and video guides.
Prepare your email template in Mailjet
1. Create a new email in Mailjet
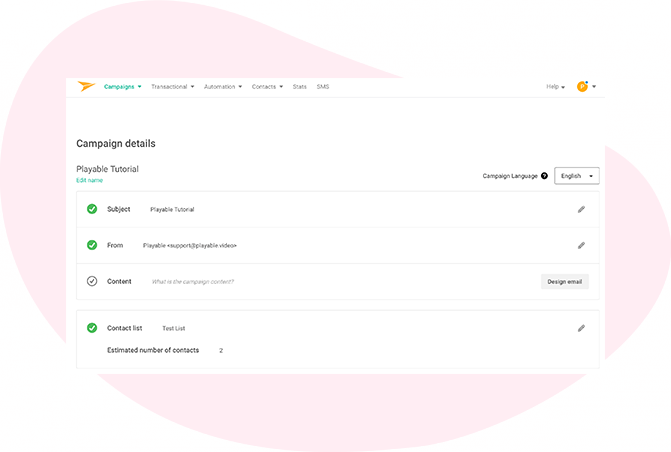
Create a new Mailjet email campaign in the normal way.
Select a new Regular Campaign. Complete the details, Subject Line, From, and Name the campaign.
Finally, save and continue.
2. Select your email template
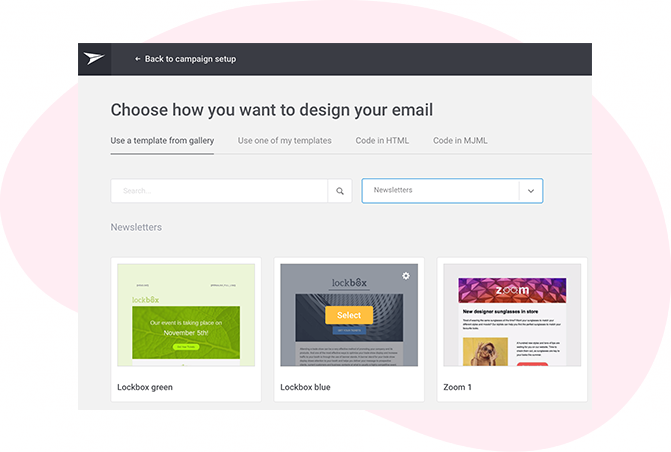
Select the Template you wish to use as the basis for your campaign, focusing on where you want the video to appear.
Please note that video email delivers better results when the video appears at the top of the email, or above the fold.
3. Edit the email template
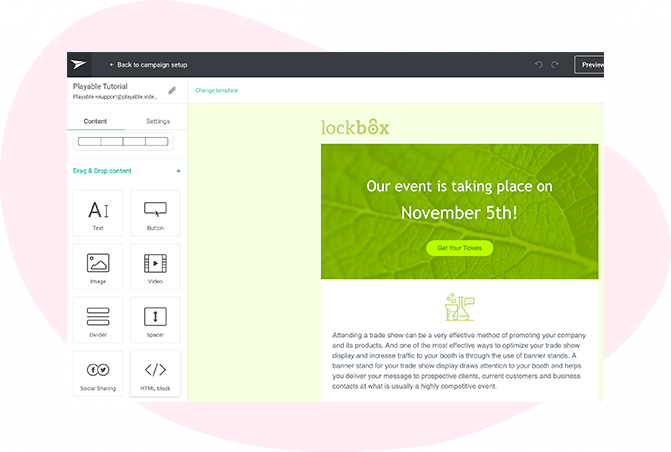
Add blocks, delete blocks and edit your content within the email template in the normal way.
4. Add an HTML Code Block
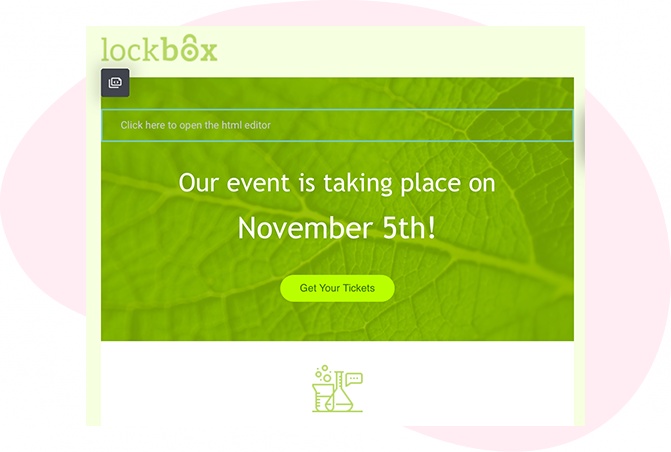
Simply drag and drop the HTML Code Block to where you want the video to appear in the email. You will return to this step shortly to add the video via this code block.
When you are done, Save & continue.
Import your video into Playable
5. Create your Playable account
If you are new to Playable you need to create a new account.
Once you are logged in you will see the Playable’s Welcome page, click Videos to continue.
Please note that Playable offers a 30-day free trial account to test drive the platform. After which you can upgrade your plan or purchase extra plays as required.
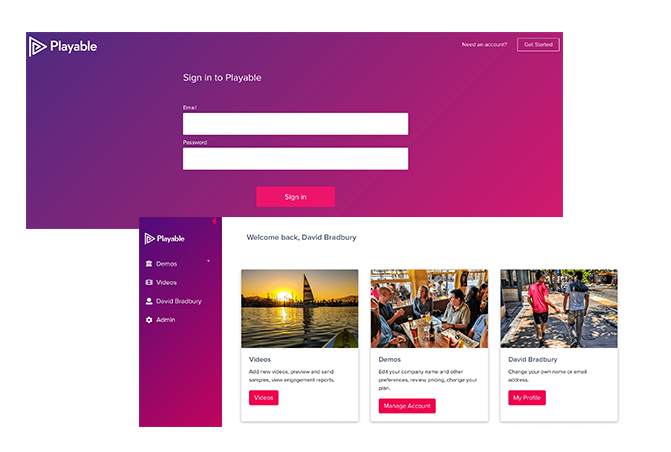
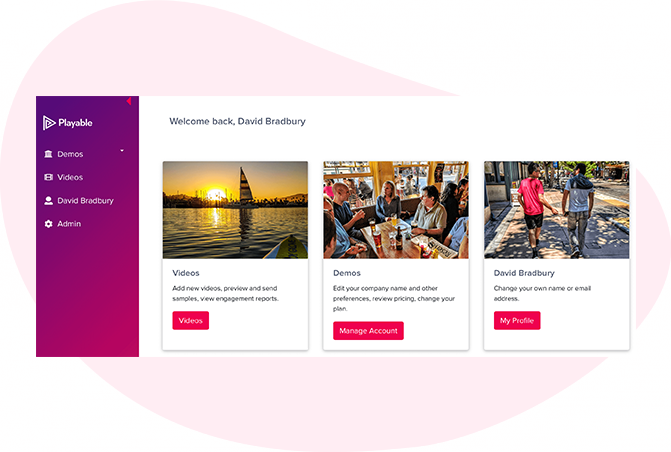
6. Access your Playable videos
You will start on the Playable home page of your new account. To start creating a new video for your email click Videos.
7. How to add a new video
To commence the process of creating a new video for use in your email simply click + Add Video.
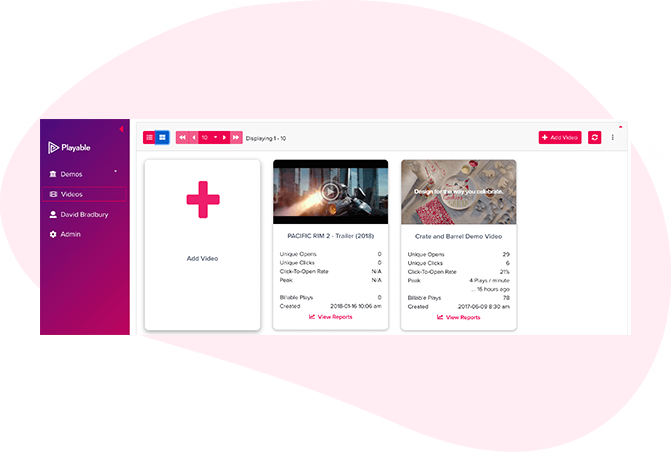
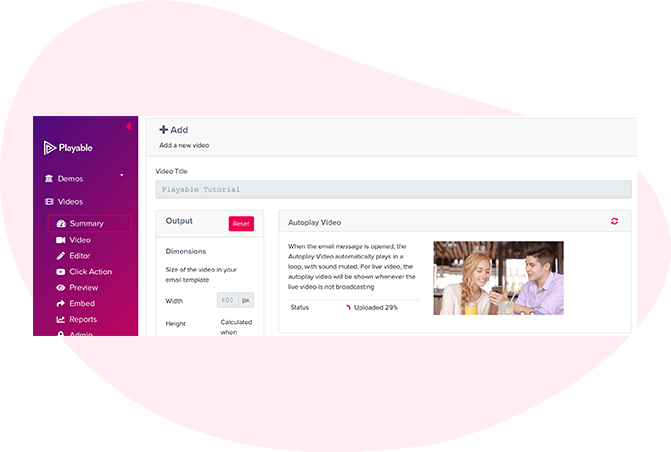
8. Upload your video to Playable
Create a title for your video, this will be used to locate it in the future in your Playable account and in reporting. Referencing the dimensions of the image position holder in the email template you can now enter the size (width) of the video content you are looking to create, or keep the optimum size as suggested by Playable.
You have 2 options on how to upload your video content to Playable:
- Copy & paste a URL of the video’s location – Playable accepts content from all the major hosting platforms including YouTube, Vimeo, Brightcove, TikTok, Facebook, and Instagram.
- File Upload – Upload a file from your computer. All video file formats are accepted, including MP4, AVI, and MOV.
Once you have selected your video, click the Apply button to upload your video file.
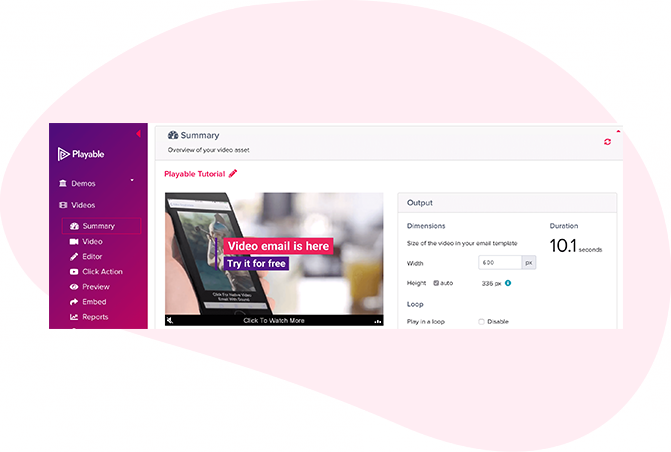
9. Automatic video preview
As your video is uploaded Playable creates a 10-second preview. You can choose to use this version of the video or create your own version using our Online Editor.
If you wish to use the video created by Playable, select Click Action from the menu to continue preparing the video.
If you prefer to create your own version of the video select Editor from the menu.
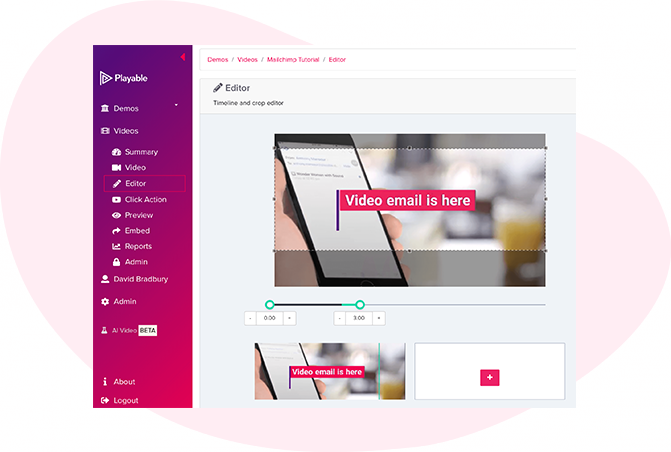
10. Edit your email video
Having completed the configuration of your video it is now time to edit your video. To commence this click Editor.
Our Online Editor is designed to enable you to create a video clip from the full-length video you uploaded. It is this edit that will be played in your video email. In the Editor, you can crop the video to focus on key content and select multiple scenes to change the duration of the video.
As you are creating your video email the Editor will show you the total duration and allow you to preview the edits, and re-edit until you are happy with your final cut. Once you are happy with your edit click the Continue button.
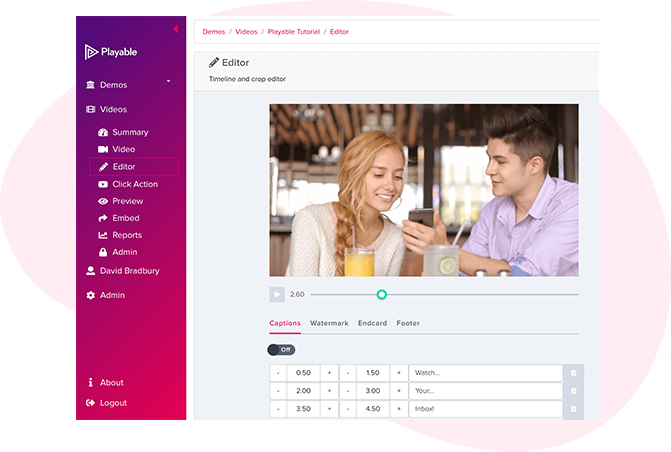
11. Enhance your email video
You are now ready to add enhancements to your video, including Captions, Watermark, Endcard, or Footer. Simply select the enhancement you wish to add and follow the onscreen prompts to add it to your video.
You now have completed creating your video clip, so click the Compile button to continue.
Playable now compiles this video, creating multiple versions, which will be used to ensure each recipient receives an optimized video most suitable for their device, bandwidth, and connection.
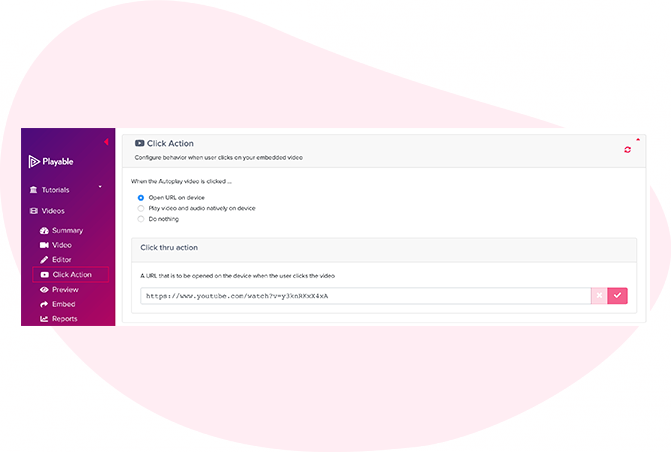
12. Add a Call-To-Action (CTA) link
As the video is playing within the recipients’ email the option exists to include a Call-To-Action (CTA) link within the video.
To set your Click Action, add the link/URL of the destination page you want any clickers of the video to be re-directed to, and save it.
13. Preview & sample your video email
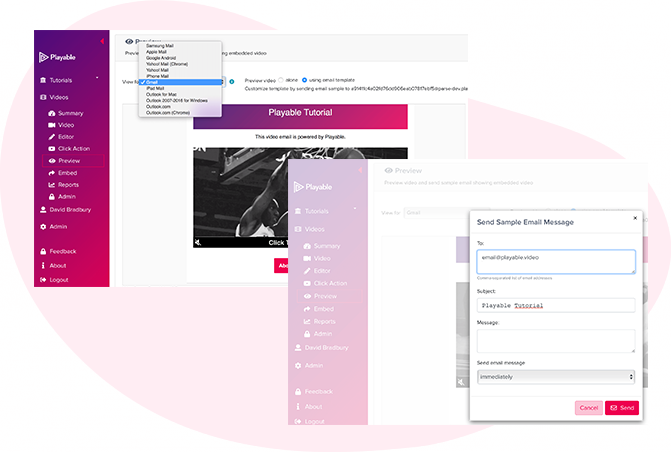
Preview how your video email plays in the major email clients by using the drop-down above the preview window.
You can also send a sample of your video email for internal review. Click the Sample button, complete the form, and hit Send. You can add a message to the sample. This is useful when circulating for internal feedback.
Once you are happy with the sample click Embed in the left-hand menu to continue.
14. Your email video is now created
Your video is now successfully compiled so now it’s time to add the video to your email template.
The first step is to copy Playable’s HTML Embed Code into Mailjet.
Copy the Embed Code from Playable
15. Embed the video into your Mailjet campaign
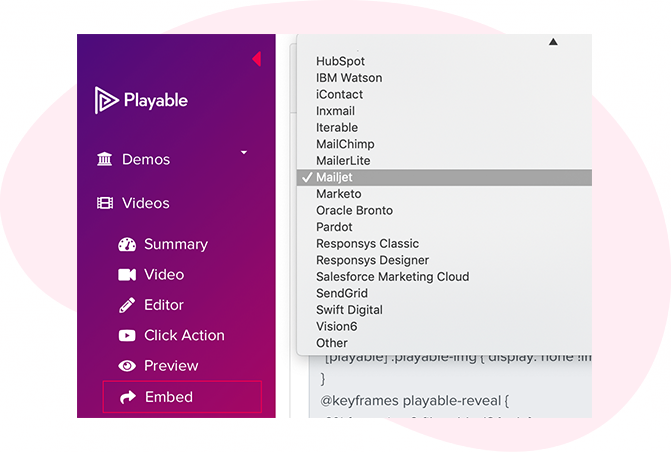
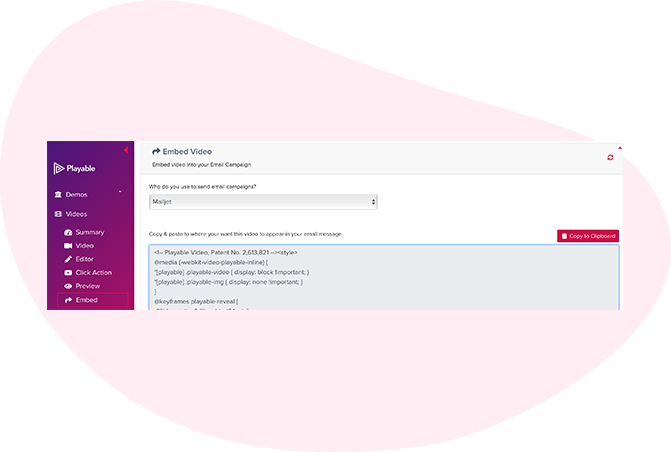
To embed the video into your email template select Mailjet from the drop-down list of email providers, on the Embed page.
The HTML Embed Code, optimized to Mailjet, will appear below. Always use the latest Embed Code to ensure capturing all changes made to the video and settings.
Click the Copy to Clipboard button to grab all the Embed Code to paste it into your Mailjet email template.
Paste the Embed Code into Mailjet
16. Paste the HTML into Mailjet template
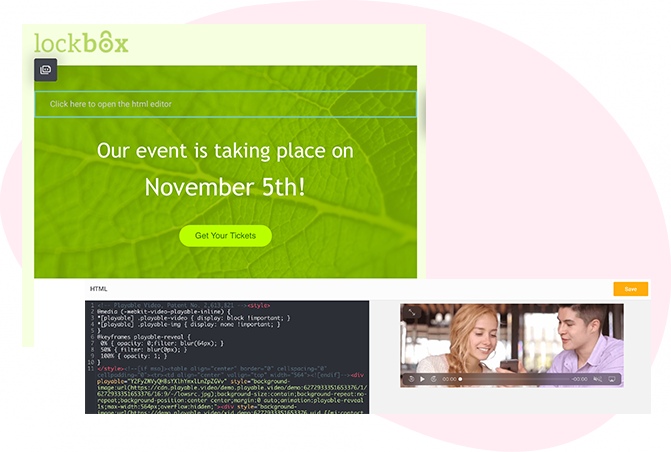
Return to your Mailjet email template, from the previous step.
As you used the Copy to Clipboard button to grab Playable’s HTML Embed Code, simply paste it into the HTML Code Block.
Then Save changes and continue.
Continue to design, test, and send your campaign using Mailjet
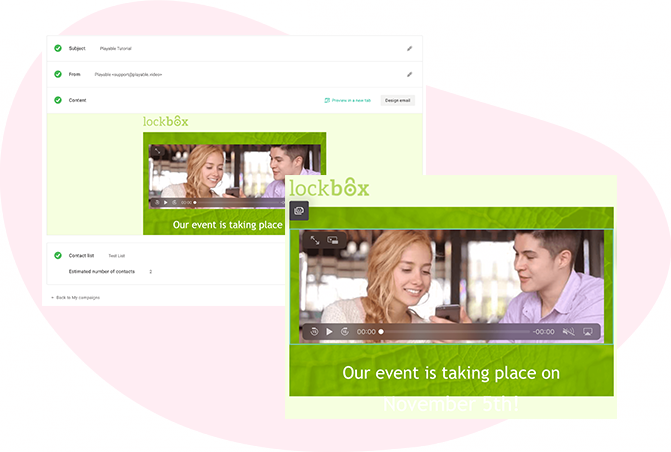
17. Test and send your video email
Your video content is now embedded in your email template within Mailjet, you can preview this and see the video playing.
To send your video email to continue to test and send your campaign in the normal way.
Seeing Is Believing
Happy Hour Is Happier With Video
You can now watch Yard House delicious beer, buffalo Wings and al pastor taco displayed in video emails, tempting customers was never easier.
Crealy Rides Now In Entertaining Videos
Theme parks With high-quality video email, Crealy Theme Park can show off their new and exciting rides, right in everyone's inbox...so get in line!
A Rampart Casino Experience In HD Video
Gambling Nothing is better than a high-definition video to show customers the allure of a resort with all its appealing features...directly in their inbox.
Video Brings The Show To Your Email
Gambling With HD video email, we'll get ready to buy tickets to sing along in Casinos Regina & Moose Jaw shows!

